Table of Contents
Proper Installation Steps for a 4-Way Garden Hose Splitter
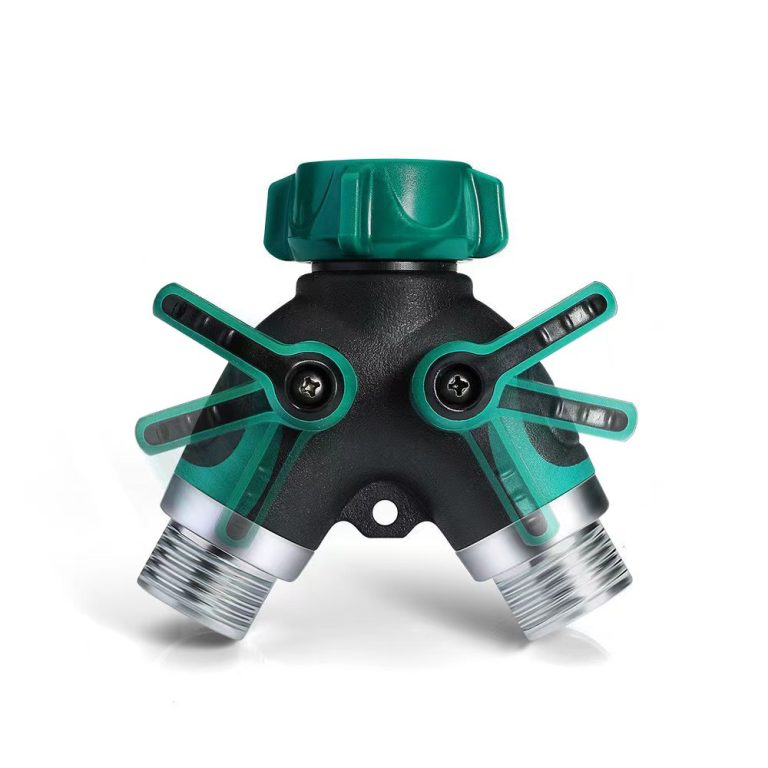
A 4-way garden hose splitter is a useful tool for anyone with a multi-zone garden. It allows you to connect multiple hoses to a single water source, making it easier to water different areas of your garden without having to constantly switch hoses. However, installing a 4-way garden hose splitter can be a bit tricky if you’re not familiar with the process. In this article, we will walk you through the proper steps for installing a 4-way garden hose splitter to ensure that it functions correctly and efficiently.

The first step in installing a 4-way garden hose splitter is to gather all the necessary tools and materials. You will need a 4-way garden hose splitter, a wrench, plumber’s tape, and possibly a pair of pliers. Once you have everything you need, you can begin the installation process.
Start by turning off the water supply to the area where you will be installing the 4-way garden hose splitter. This is important to prevent any water from leaking out while you are working. Next, attach the 4-way garden hose splitter to the water source using a wrench to tighten it securely. Make sure to use plumber’s tape on the threads to create a watertight seal.
Once the 4-way garden hose splitter is securely attached to the water source, you can begin connecting your hoses. Each outlet on the splitter should have a valve that can be turned on or off to control the flow of water to that particular hose. Attach your hoses to the outlets on the splitter, making sure to tighten them securely with a wrench.
After all of your hoses are connected, turn on the water supply and check for any leaks. If you notice any leaks, use plumber’s tape to create a tighter seal on the connections. Once you have confirmed that there are no leaks, you can begin using your 4-way garden hose splitter to water your garden.
One important thing to keep in mind when using a 4-way garden hose splitter is to avoid overloading it. Each outlet on the splitter is designed to handle a certain amount of water flow, so make sure not to exceed this limit. If you need to water a large area, consider using multiple splitters connected to different water sources to ensure that each hose receives an adequate amount of water.
In conclusion, installing a 4-way garden hose splitter is a simple process that can greatly improve the efficiency of watering your garden. By following the proper steps outlined in this article, you can ensure that your splitter functions correctly and efficiently. Remember to gather all the necessary tools and materials, turn off the water supply before beginning, and check for leaks before using your splitter. With a 4-way garden hose splitter, you can easily water multiple zones in your garden without the hassle of constantly switching hoses.
Benefits of Using a Multi-Zone Garden Hose Splitter in Your Garden
A multi-zone garden hose splitter is a valuable tool for any gardener looking to efficiently water multiple areas of their garden without the hassle of constantly moving hoses around. By installing a 4-way garden hose splitter, you can easily connect multiple hoses to a single water source and control the flow of water to each zone independently. This allows you to water different areas of your garden with varying water requirements simultaneously, saving you time and effort in the process.
One of the key benefits of using a multi-zone garden hose splitter is the ability to customize your watering schedule to meet the specific needs of your plants. Different plants have different watering requirements, and by dividing your garden into separate zones, you can easily adjust the water flow to each zone based on the needs of the plants growing there. This ensures that each plant receives the right amount of water, promoting healthy growth and reducing the risk of over or under-watering.
Another advantage of using a 4-way garden hose splitter is the convenience it offers in managing your garden’s irrigation system. Instead of having to manually move hoses around to water different areas of your garden, you can simply turn the valves on the splitter to redirect water flow to the desired zone. This not only saves you time and effort but also helps to prevent damage to your plants by ensuring they receive a consistent and adequate water supply.
Installing a 4-way garden hose splitter is a relatively simple process that can be done by following a few easy steps. The first step is to choose a suitable location for the splitter near your water source, ensuring that it is easily accessible and can accommodate multiple hoses. Once you have selected a location, you can attach the splitter to your water source using a standard garden hose connector. Make sure to tighten the connections securely to prevent leaks.
Next, you will need to connect your hoses to the splitter, ensuring that each hose is securely attached and that there are no kinks or bends that could restrict water flow. Once all hoses are connected, you can adjust the valves on the splitter to control the flow of water to each zone. It is important to regularly check and adjust the water flow to ensure that each zone is receiving the right amount of water.
In conclusion, installing a 4-way garden hose splitter is a practical and efficient way to manage your garden’s irrigation system and ensure that your plants receive the water they need to thrive. By dividing your garden into separate zones and controlling the flow of water to each zone independently, you can customize your watering schedule to meet the specific needs of your plants. With the convenience and flexibility offered by a multi-zone garden hose splitter, you can save time and effort in watering your garden while promoting healthy plant growth.

